Getting started with workflows
Creating new workflows
Click the + button next to the Workflows in the left menu. Once the New Workflow dialog appears, enter the name for the new workflow and click Create.
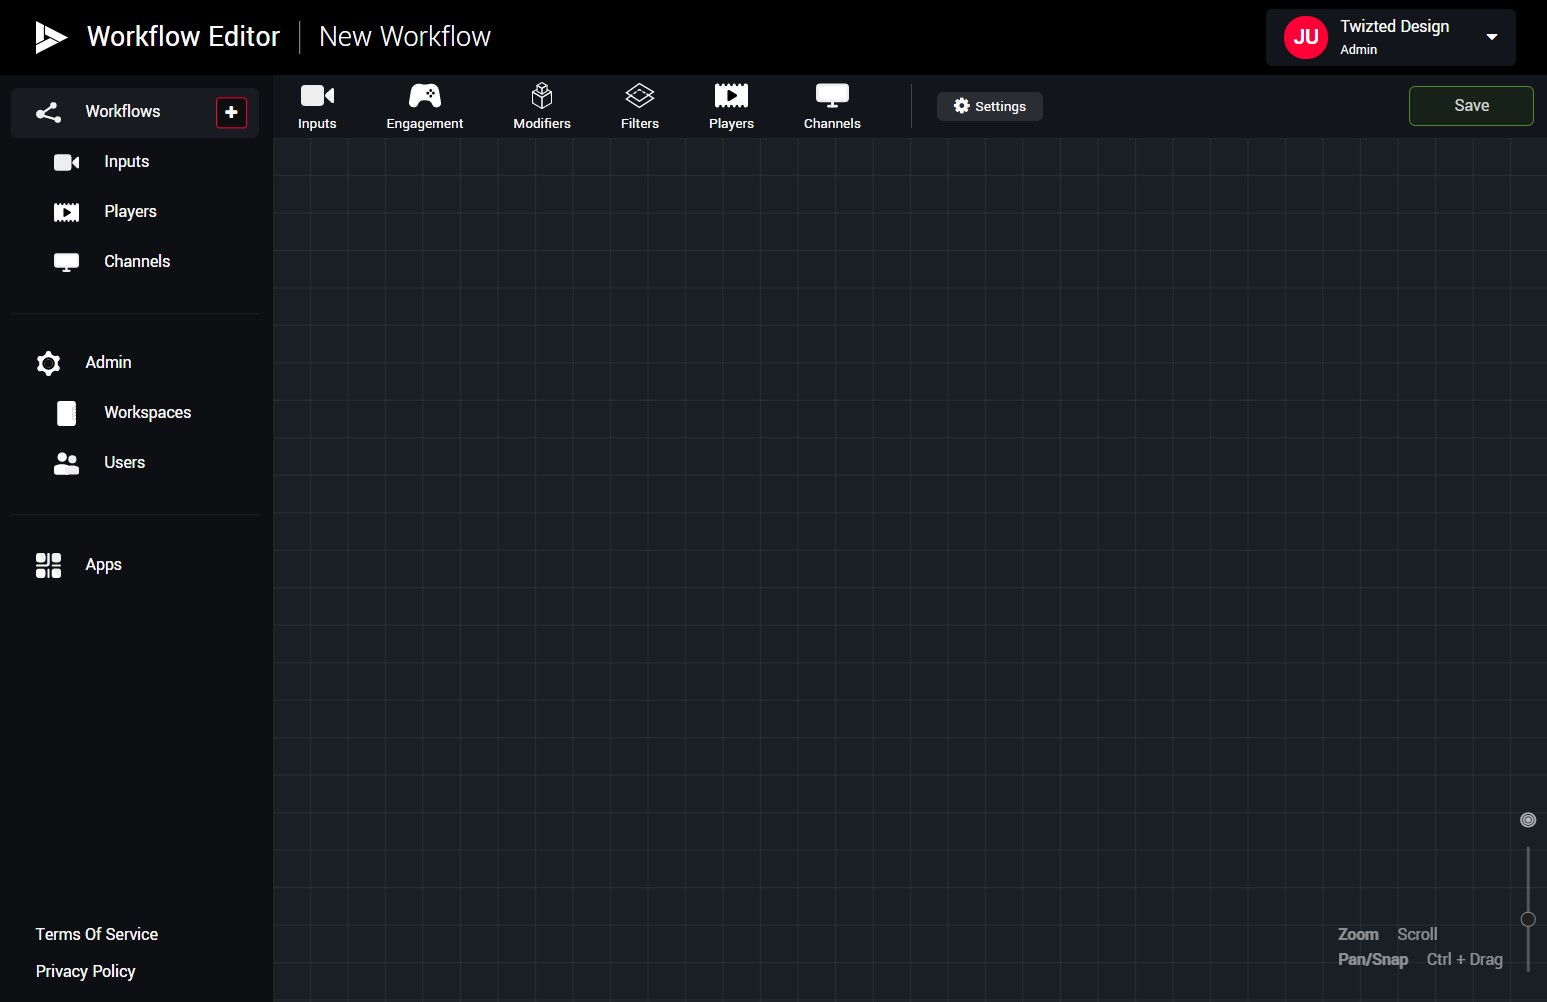
Once a new workflow is created the Workflow Editor will open and you should see something like this:

The workflow toolbar
At the top of the workflow editor, you'll see the workflow toolbar. This toolbar allows you add entities to the workflow. There are six entity types you can add to any workflow:
Inputs
Inputs are the video sources available in the inputs section. Read about Inputs here.
Engagement
The engagement are additional overlays that can be added on top of along side of the video in the player. The engagement allow you to add interactivity to your video stream.
Modifiers
The modifies allow you to manipulate content of inputs and other nodes
Filters
Filter allow you to add conditions to your workflow. These conditions will help the workflow decide with content should be used based on the conditions introduced by the filters.
Players
Players are sharable links of the content after it was evaluated by the workflow. In other words: the result of the workflow and all the filters and the modifiers will end up in a player, and the player can be shared or embedded in external website and apps. Read more about Players here.
Channels
The Channels are a collections of inputs that are being player back via a player. In order to populate content into a channel, it has to go through a player. Read more about Channels here .
In addition to the entities dropdown, the workflow toolbar will also show addition buttons based on the selection of the nodes you make.
Adding nodes to the workflow
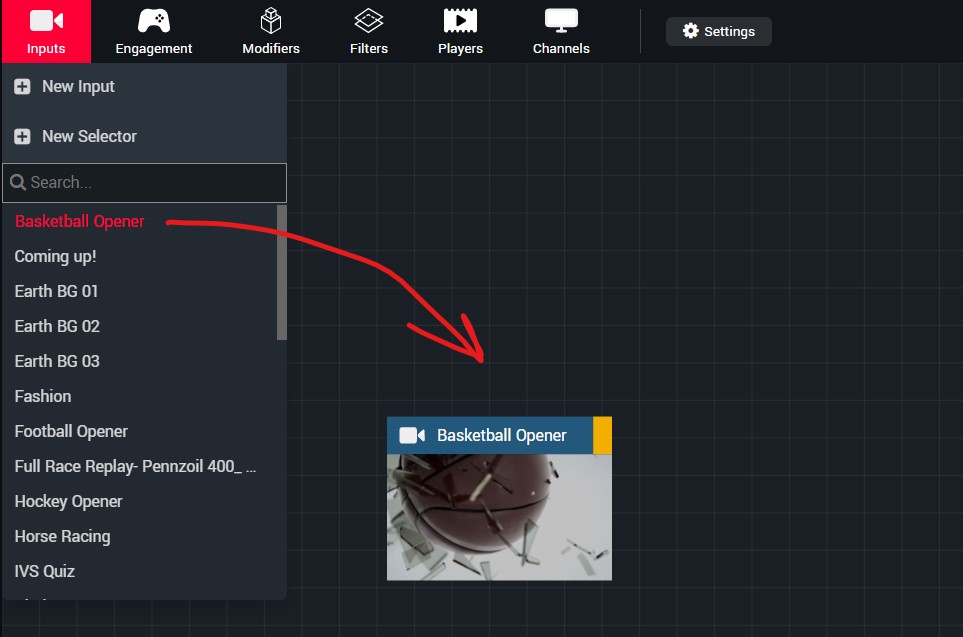
The workflow is a visual flow chart describing how content get to the viewers. Each entity dropdown, contains a list of the available entities in each section. For example: the Inputs drop down will contain all available inputs that you can manage in the Inputs section. Same goes for the Players and the Channels . The Modifiers and the Filters dropdown will show the available nodes respectively.
In order to add a new node to the workflow, simple select the entity you want to add from each dropdown. When selected, the entity will be added to the workflow as a node.

Each node has connectors that can be used to connect each node to the next one. The connectors are the Yellow rectangle on the left and right of each node. The flow of connections is from left to right. This means the the Input is always on the left side of the node and the output of a node is on its right.
Not all node has both input and outputSome nodes might have only and input or an output. For example, the Input node has only an output connector since nothing can be connected to it. And the Channel node has only an input side it cannot be connected to anything else.
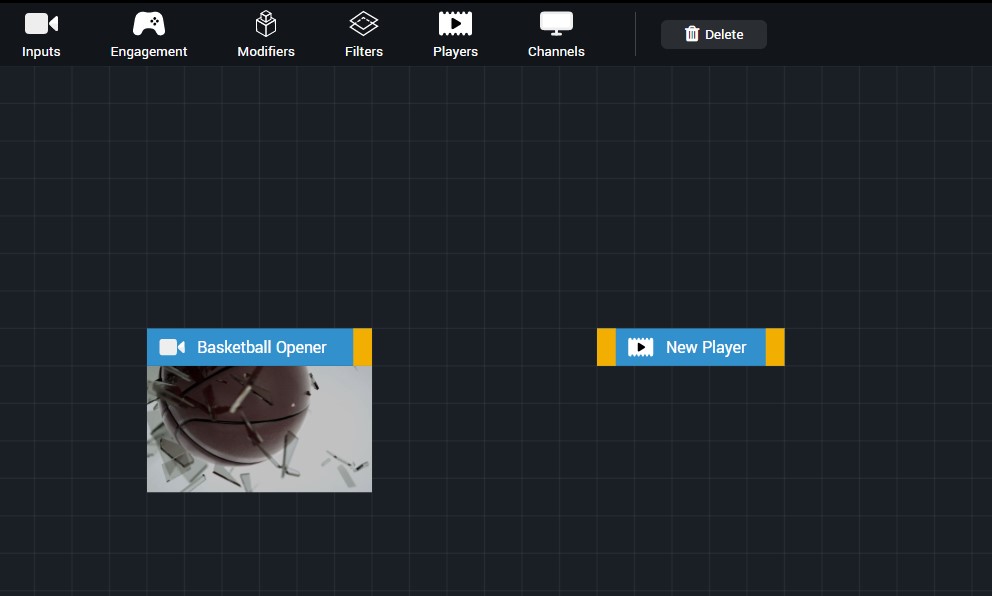
You can add multiple nodes to each workflow, by selecting them from the entities dropdowns. In the example below we added two nodes, one is an input and the other is a player

Two nodes are added to the workflow
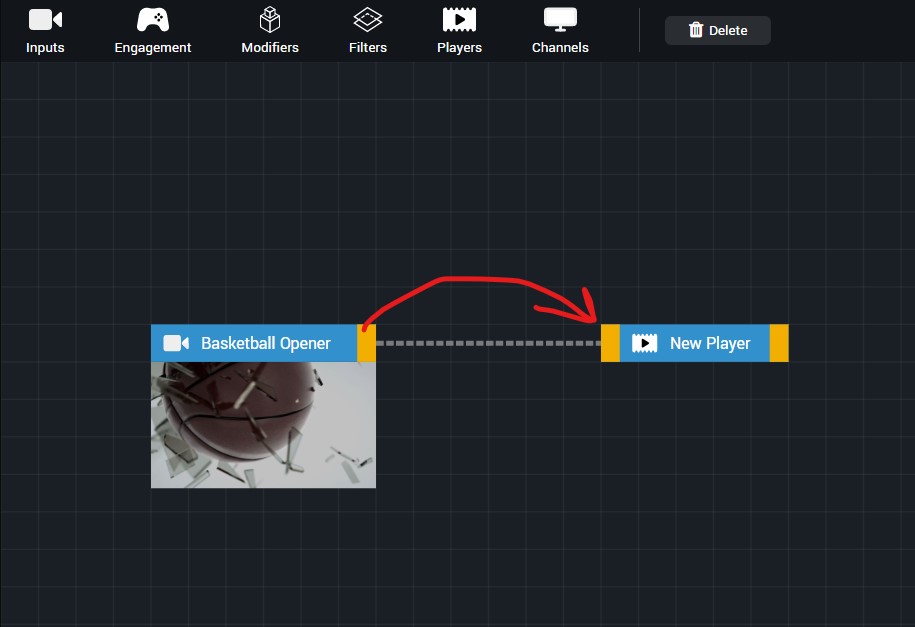
Currently these nodes have no relation to each other because they are not connected. In order to connect the two nodes drag the output of node to the input of the other (you can also drag a input to the output).

Once the nodes are connected, you can save the workflow by click the Save button at the top right of the workflow editor. In the example above we have connected an input to the player. This means that the player will show the content of the connected input when it will be loaded.
Connections can be changedWhen connecting input to players, you essentially route content into a player. This means that the url of the player can stay the same while the content of the player might change. This functionality is useful if you embed a player in your website and wish to change the content of the player without the need to change the embed link. Basically you are using the CMS to manage you video content online.
Updated 8 months ago